
You may already use Grok for news and copy ideas, then switch to the FRIDAI dashboard for customer service and posting. With FRIDAI added as a Grok connector, one sentence is enough to check a brand, improve a Notebook or line up a draft.
This guide walks through eight steps: open Plugins, add a custom connector, fill in the name and URL, allow the connection, confirm it is connected, review the tools, and ask your first question in a chat. Every step has a real desktop and phone screenshot, followed by handy requests and quick fixes.
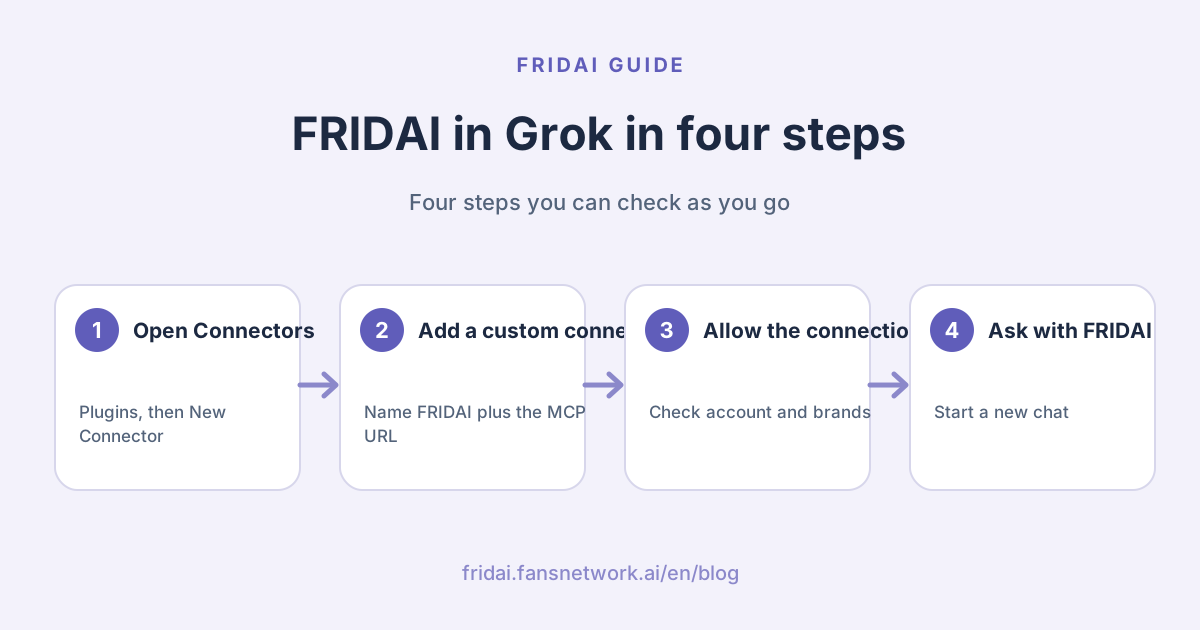
What can Grok do once FRIDAI MCP is connected?
FRIDAI MCP is the connection that lets an AI assistant work with your FRIDAI account. Once it is added to Grok, Grok uses your FRIDAI account to read your brands, AI Notebooks, DM conversations and auto-posting settings, and adjusts them after you confirm.
The four things people use most:
- Check brands and connections: one sentence lists the brands you manage and which social accounts need to be reconnected.
- Inspect an AI Notebook: the built-in FRIDAI Notebook Optimizer reads the current Notebook and recent customer conversations, points out conflicting rules and missing business facts, then suggests changes.
- Draft a post: name the topic and platform, and Grok shows you a draft first; it goes into auto-posting only after you approve it.
- Review today's DMs: Grok sums up today's conversations and flags the ones that need a person.
Every change is previewed first and runs only after you confirm. To see which jobs suit Grok Bot automations and which suit FRIDAI, read Grok Bot automation vs FRIDAI.
Before you start: check three things
- You have an active FRIDAI subscription. Sign in with the same email you subscribed with, so Grok sees your brands. Brands fully shared with you appear too.
- Open grok.com in a desktop or phone browser. This guide uses grok.com on the web; the connector settings live in the left menu there.
- Have FRIDAI's MCP URL ready. You need it in step 4:
https://www.fansnetwork.ai/. Authorization only happens on FansNetwork.ai; sign in nowhere else.api/ mcp/ ruleops
Step 1: Click "Plugins" in Grok's left menu
After signing in to grok.com, look at the bottom of the left menu and click "Plugins".

"Plugins" sits below the Bots list. If the menu is collapsed, expand the sidebar from the top left first.
Step 2: Open "Connectors" and click "New Connector"
The Plugins page has three tabs: Connectors, Skills and Bots. Stay on "Connectors" and click the white "New Connector" button at the top right.

Step 3: Choose "Custom"
In the "New Connector" dialog, the first option is "Custom", described as Add your own custom connector. Click it.

Step 4: Name it FRIDAI and paste the Server URL
The "Custom Connector" form has two fields:
| Field | What to enter |
|---|---|
| Name | FRIDAI |
| Server URL | https://www.fansnetwork.ai/ |
Then click "Add Connector" at the bottom right.

Tip: name it exactly FRIDAI, so "use FRIDAI" in a chat points Grok straight to it. Grok connectors keep the name they were created with; to rename one, click "Disconnect" and add it again.
Step 5: Sign in to FRIDAI and click "Allow connection"
After "Add Connector", a small FansNetwork.ai window opens. Sign in with your subscription email if you are not signed in yet, and the "FRIDAI secure authorization" page appears.

Check four rows before you click:
- Signed-in account: the email you subscribed to FRIDAI with.
- Managed brands: the right number, including brands fully shared with you.
- MCP: Grok.
- Return after approval: grok.com.
The text below spells it out: connect once, and plans you buy later and new FRIDAI features are included automatically; anything that changes data shows a preview and runs only after you confirm. FRIDAI hands the key straight to Grok, so there is no API key to copy or paste. Click "Allow connection".
Step 6: Back in Connectors, confirm FRIDAI is connected
The small window closes on its own. On the Connectors tab, FRIDAI now appears under "Connected" with www.fansnetwork.ai and an "Added" label.

"Added" means you are connected.
Step 7: Open FRIDAI and check that all tools are enabled
Click FRIDAI under Connected to open its details. It says "All tools enabled", followed by a row of ticked tools such as analysing Notebook quality, creating an auto-post draft and cancelling scheduled posts. "See more" shows the full list.

Remember the two buttons at the top right:
| Button | When to use it |
|---|---|
| Reauthenticate | You switched FRIDAI accounts or added a subscription and want to authorize again |
| Disconnect | You want to remove FRIDAI or rename the connector |
Step 8: Start a new chat and ask with FRIDAI
Go back to Chat and start a new conversation. A good first question is "Use FRIDAI to tell me what you can do for me. List the 5 things people use most." We asked it in Chinese in the screenshots below.
Above the answer, Grok shows what it did. One line reads "Used Fridai Get Fridai Product Knowledge", which means it read FRIDAI's own information.

Then it lists FRIDAI's five most used features: AI DM customer service, AI comment replies, auto-posting, fixed keyword replies, and bookings with customer data collection.

This step only reads information and changes no settings, which makes it a good connection check.
Four handy requests for FRIDAI in Grok
Copy these and replace the brackets with your brand:
| What you want | What to say |
|---|---|
| See your brands | "Use FRIDAI to list the brands I can manage and flag accounts that need reconnecting" |
| Check a Notebook | "Use the FRIDAI Notebook Optimizer on (brand)'s Notebook; don't change anything yet" |
| Draft a post | "Use FRIDAI to draft a Threads post for (brand); show me first" |
| Review today's DMs | "Use FRIDAI to review (brand)'s DMs today and tell me which need a person" |
Start with "Use FRIDAI", then name the brand and the job, and finish with "show me first" or "don't change anything yet". Grok previews the change and saves it to FRIDAI after you confirm.
Quick fixes when it won't connect
| What you see | What to do |
|---|---|
| No sign-in window after Add Connector | The browser blocked the popup. Allow popups for grok.com, or look for the window behind Grok |
| "Connection failed" | The sign-in window timed out. Add the connector again and click "Allow connection" promptly |
| The authorization page says the account is not eligible | That email has no FRIDAI subscription or linked social account yet. Subscribe or link an account in the dashboard, then authorize again |
| A brand is missing | Sign in with that brand's subscription email, or ask the owner to fully share the brand with you, then click Reauthenticate |
Summary: manage AI customer service with FRIDAI MCP in Grok

A quick note from FRIDAI
Nice work, FRIDAI is now a connector in your Grok. To check a brand, inspect a Notebook or line up a draft, open a chat and say it in one sentence.
Keep these in mind:
- The way in is grok.com, "Plugins", "Connectors", "New Connector", then "Custom".
- Name it FRIDAI and paste FRIDAI's MCP URL as the Server URL.
- On the authorization page, check the email and brand count, see Grok and grok.com, then click "Allow connection".
- Start requests with "Use FRIDAI" and say "show me first" when something should change.
Once it is connected, try "Use FRIDAI to list the brands I can manage" with me first ☺️
FAQ
Does connecting FRIDAI MCP in Grok cost extra?
FRIDAI charges nothing extra for the connector. It uses your existing FRIDAI subscription and quota, and the brands and features you can manage follow your subscription.
Do I need to paste an API key?
No. Sign in on FansNetwork.ai and click "Allow connection". FRIDAI hands the key straight to Grok, so there is nothing to copy, paste or store.
Will Grok change my settings on its own?
Anything that changes data shows a preview first and runs only after you confirm. Add "show me first" or "don't change anything yet" to a request and Grok stops at the preview.
How do I fix a mistyped connector name?
Grok has no rename option for connectors. Open the connector, click "Disconnect", then repeat steps 2 to 5 and name it FRIDAI.
Can I set it up on my phone?
Yes. Open grok.com in your phone browser; the menu and steps match the desktop, and the authorization page switches to a vertical layout. Every screenshot in this guide has a phone version.
I also use ChatGPT. Can I connect both?
Yes. FRIDAI MCP can be connected to Grok, ChatGPT, Claude and other MCP-capable AI tools at the same time, authorizing each one once. For ChatGPT, see Install the FRIDAI plugin in ChatGPT.
How FRIDAI can help
FRIDAI Chat answers DMs from the AI Notebook you write and alerts you when a person should step in. With FRIDAI MCP in Grok, checking the Notebook, reviewing DMs and drafting posts all happen in the chat, without hunting through the dashboard.
For every way to connect and every available command, read the FRIDAI MCP manual. ChatGPT users can follow Install the FRIDAI plugin in ChatGPT, and Claude or Codex users can see set up DM keyword auto-replies with an AI assistant.
- DM customer service: FRIDAI Chat
- Comment engagement: FRIDAI Social
- Social auto-posting: FRIDAI Post
- Instagram: FRIDAI Instagram
- Threads: FRIDAI Threads
- Facebook: FRIDAI Facebook
Official sources
- Grok: grok.com
- FRIDAI MCP manual: fridai.fansnetwork.ai/
en/ mcp - Model Context Protocol introduction: modelcontextprotocol.io/
introduction